Gig Performer Notes
Andrew Hunt
Workflow: Create Gig Performer Presets from Plugin Presets
Plugins can have hundreds or even thousands of presets. We want some useful presets to be easily available within Gig Performer when creating Rackspaces.
This workflow uses the Hammond B-3X virtual instrument from IK Multimedia
The workflow can be used with other instrument plugins, audio effects plugins and MIDI plugins.
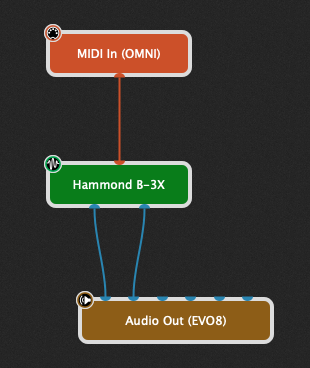
Step 1 - Insert your plugin
In a rackspace, insert your plugin. Optionally, connect it to MIDI In and Audio Out because this just makes it easier to check things.
Step 2 - Open your plugin
Double click it to open the plugin editor. This will of course look different for each plugin.
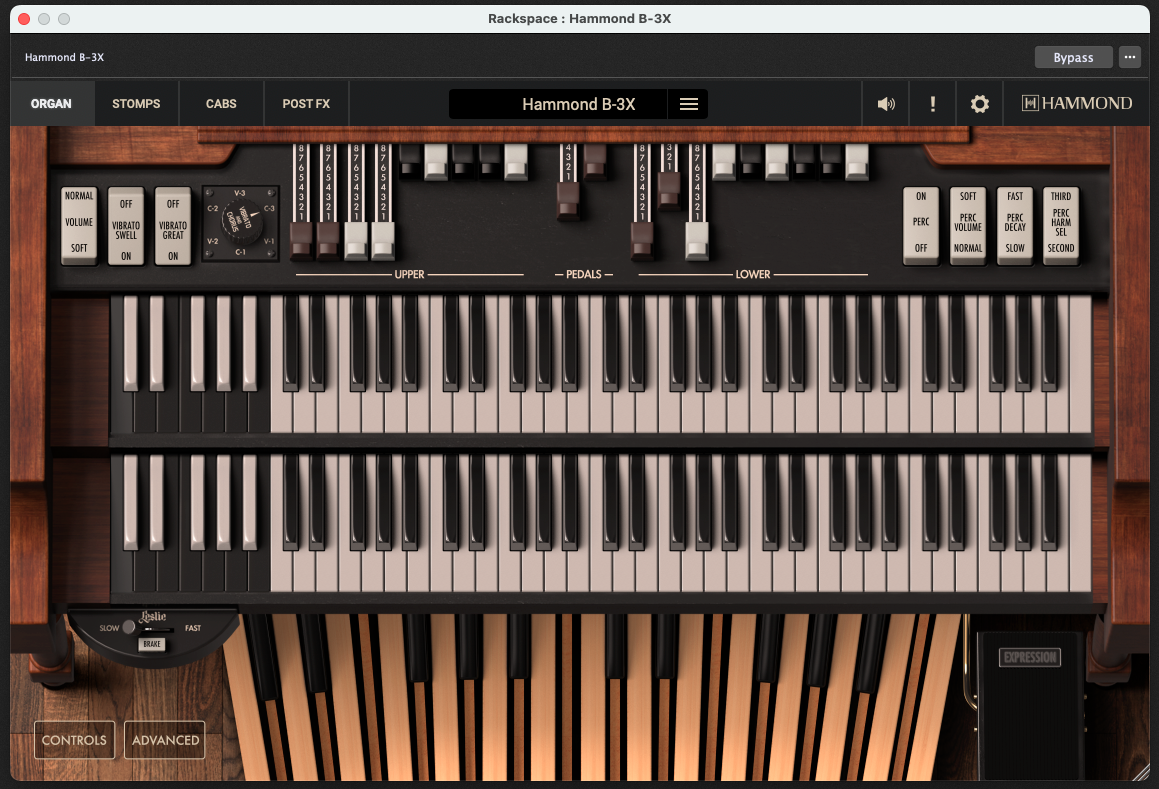
Step 3 - Select and tweak your plugin Preset
Select the preset that you want to convert to a Gig Performer Preset.
Make any changes that you want to store as a Gig Performer Preset.
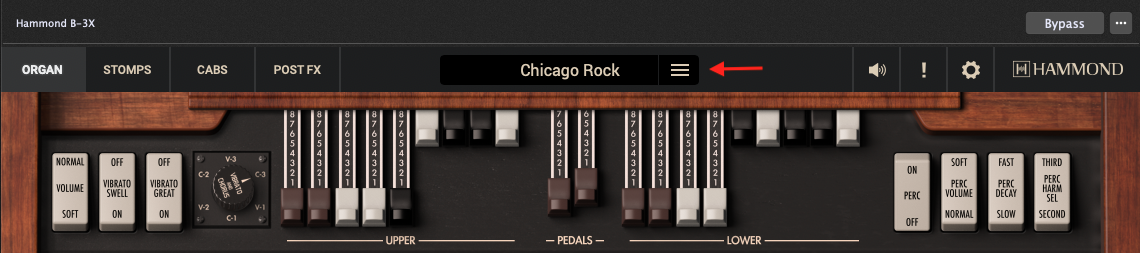
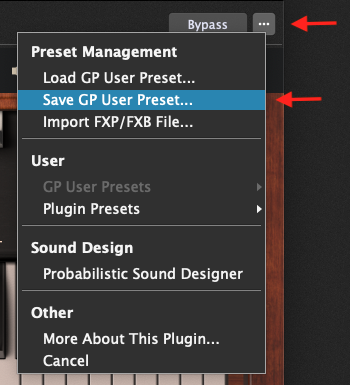
Step 4 - Save GP User Preset
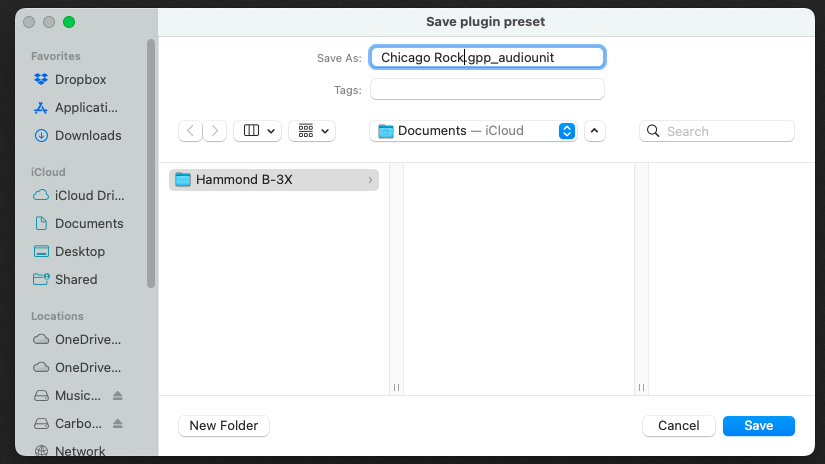
At the top-right of the editor, click the “…” elipsis and select “Save GP User Preset…”. Then enter the name for your preset. The name is often just the same as the preset name in the plugin, but you can make it anything.
RECOMMENDATION: use a descriptive name that is easy to understand later when you’re using the preset - maybe many moons later.
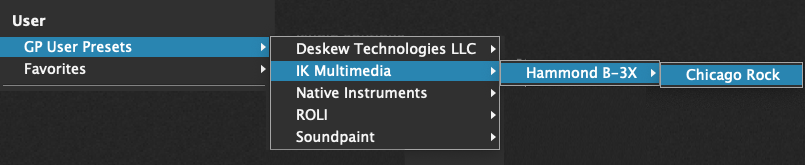
Step 5 - Use your GP User Preset
Finally, let’s use the Preset we just created.
- In a Rackspace, insert a plugin (e.g. right click)
- Under “User”, select “GP User Presets”
- Select the Supplier, Plugin and finally the preset file
- Wire the preset into your Rackspace
Drag and Drop Presets onto the Rackspace
You can drag any of the .gpp files onto the Rackspace including .gpp_internal, gpp_audiounit, gpp_vst, and gpp_vst3.
Updating Your Preset
You can change you preset by:
- As in step 4, use “Save GP User Preset…”
- Overwrite an existing Preset file
NOTE: this doesn’t automatically update the preset where it is used in other Rackspaces. You need to find each use of the Preset then replace it with the Updated Preset you just overwrote.
GP Directory Arrangement
Gig Performer does a good job of arranging the preset files in a default structure.
The default Gig Performer Presets directory is:
MacOS: `/Users/Username/Documents/Gig Performer/Presets`
Windows: `C:\Users\Username\Documents\Gig Performer\Presets`
Under that directory, Gig Performer creates a sub-directory for each plugin supplier (aka the Manufacturer).
And under that supplier directories, GP creates a sub-sub-directory for the specific plugin.
And in the sub-sub-directory, GP stores a .gpp... file with the name you provide. In fact, there several types of .gpp file depending upon which plugin type you are using - see the GP doc on file extensions
| File Type | Description |
|---|---|
gpp_internal |
saved presets of built-in GP plugins are stored in this format |
gpp_audiounit |
saved presets of AU plugins are stored in this format |
gpp_vst |
saved presets of VST plugins are stored in this format |
gpp_vst3 |
saved presets of VST3 plugins are stored in this format |
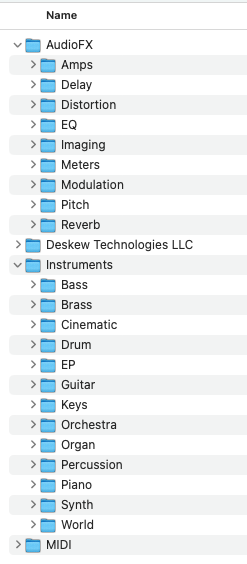
Personalise your Directories
But you can store the .gpp files in any directory structure you want. This helps quickly put together new Rackspaces.
My preference is to split Instruments, Audio FX and MIDI presets into separate directories. Then under those directories, I have categories such as Bass, Piano, and Brass for Instruments then Reverb, EQ etc for Audio FX
For tribute bands, you might want to have a directories such as The Smiths, Foals, and The Doors.
Find what works for you.